[Guide] Show a warning when typing PII
As a low-code browser automation tool, PixieBrix allows you to interact with any webpage and monitor what is being typed to dynamically interact with the page based on what was typed.
Follow this guide to learn how it works and how to customize it to work on any tool.
So what does it do?
Since PixieBrix can interact with your pages, you can create automations to check for patterns of text that are typed (such as social security numbers, credit card information, phone numbers, or other PII) and initiate actions such as disabling buttons, showing warning messages, sending message to Slack, or anything else you might want to do.
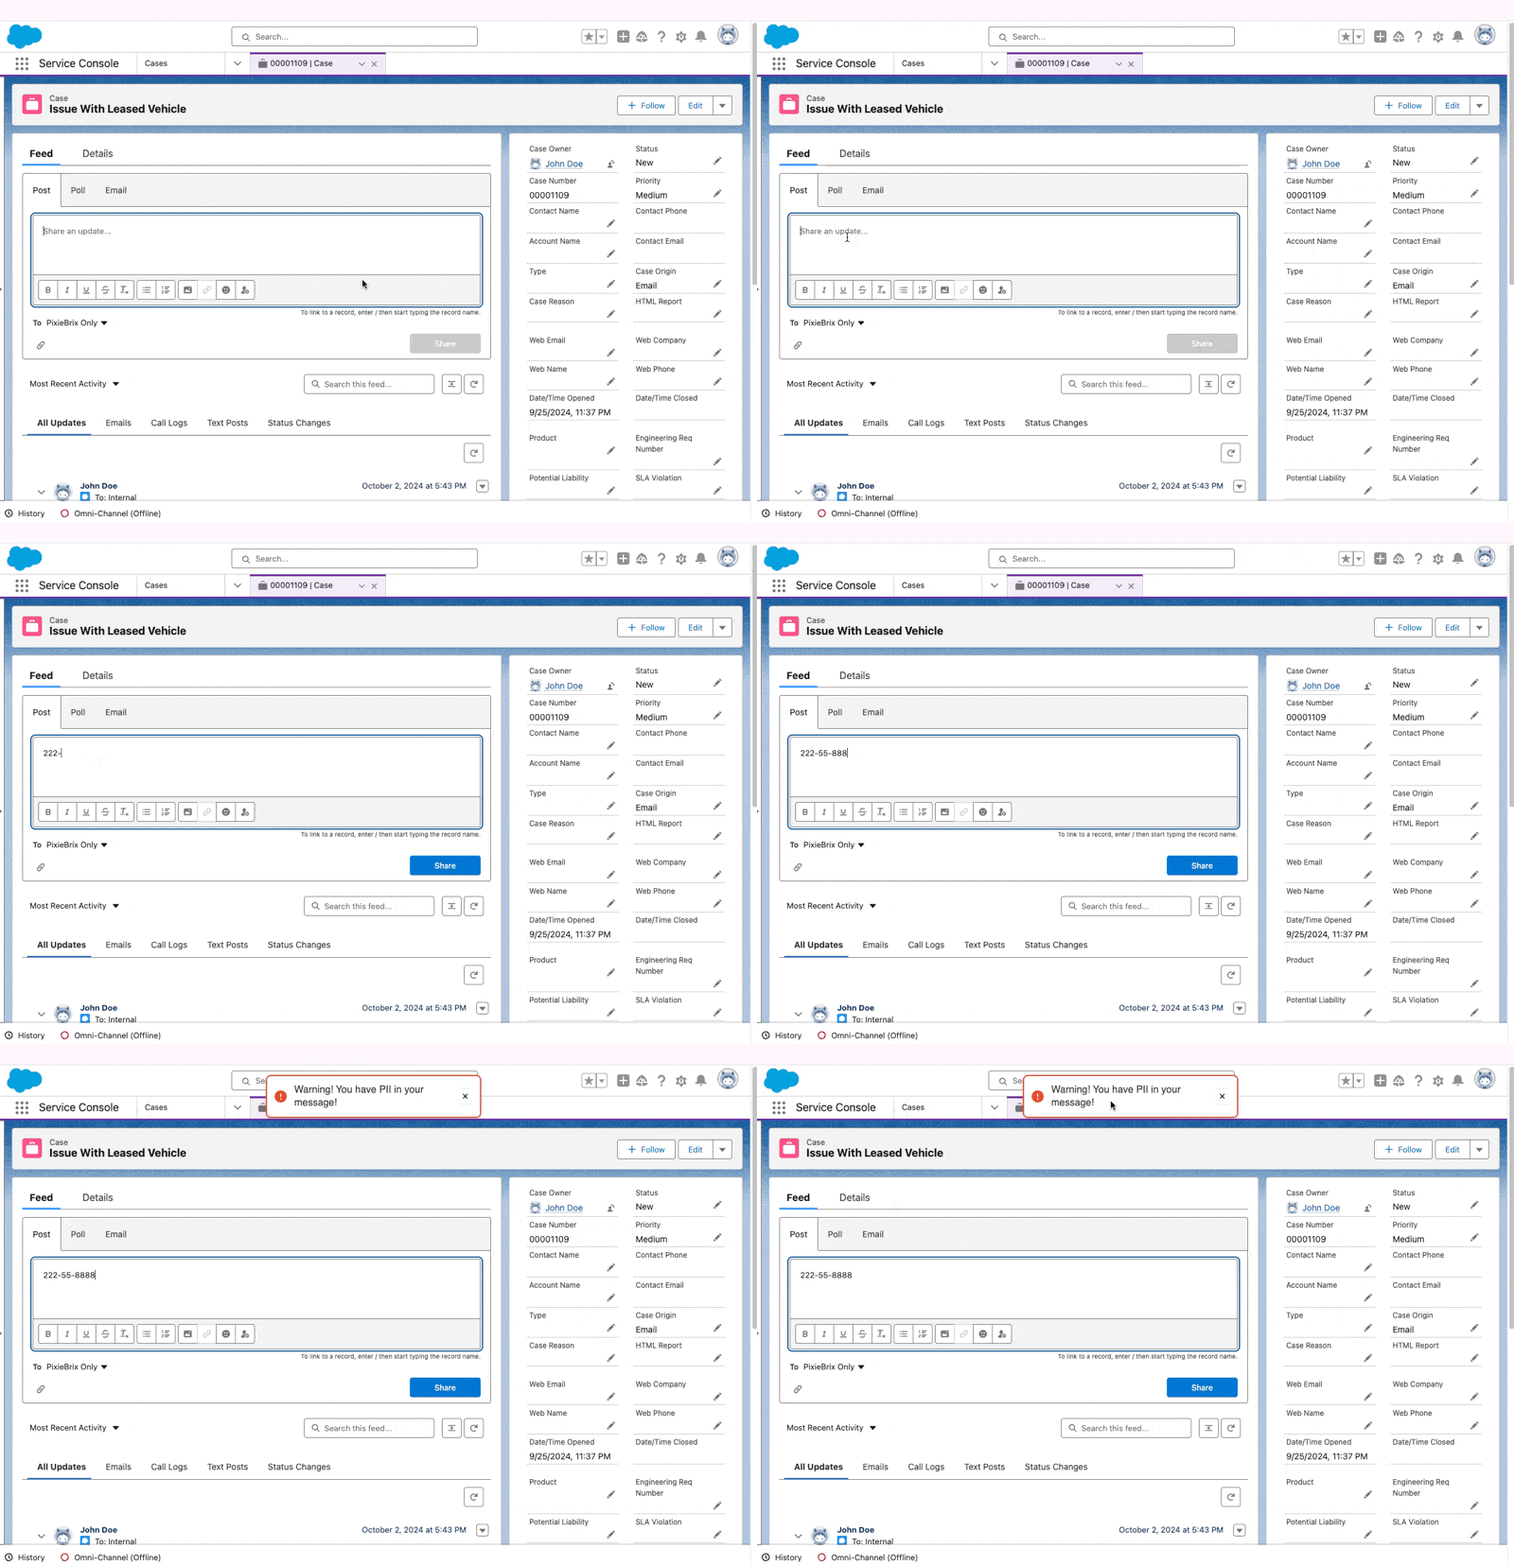
Here's an example on Salesforce:

As the user types PII into the message box, PixieBrix shows a warning letting the user know they've entered PII in the message.
Want to try it out? Activate this template mod and keep reading to learn how to customize with your tool.
How does it work?
This all works via a PixieBrix mod, which is a series of bricks that perform specific actions together to create an enhancement or automation.
Mods are made up of multiple bricks, each performing some specific action.
View the Template Mod
Let's take a look at this template mod by opening the PixieBrix Page Editor. To do this:
- Right-click anywhere on this page
- Choose Inspect
- Go to the PixieBrix tab in your Chrome Dev Toolbar
- Click the Warn When PII Typed Mod that you see in the first panel on the left of the Page Editor.
Explore the bricks inside the mod
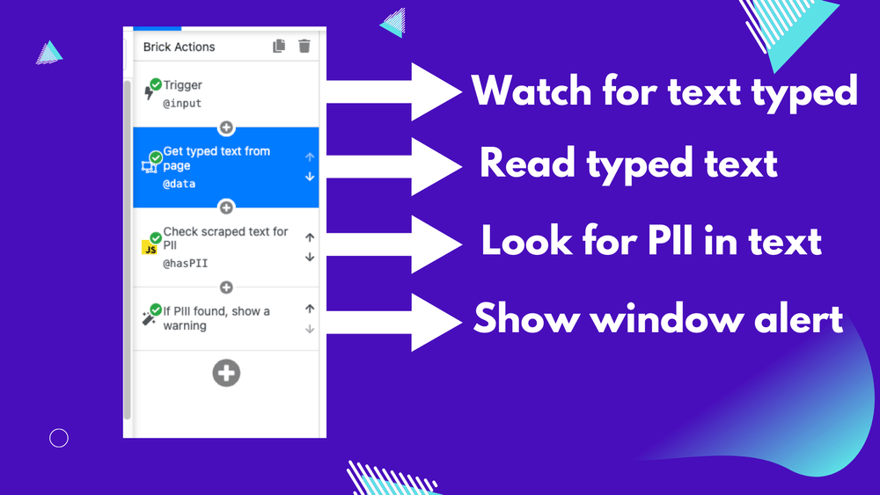
In this template mod, we have four bricks, each doing a specific action to help flag PII being typed.
To view the bricks, click the Monitor for PII being typed and alert mod nested just below the Warn When PII Typed mod package. Once you click that, you'll see a Brick Actions Panel appear with four bricks listed.
Each of these bricks executes a specific action to flag when PII is typed on a given page.

Each of these bricks have configuration options, allowing you to specify how they run.
Customize the text element in the trigger and data extractor
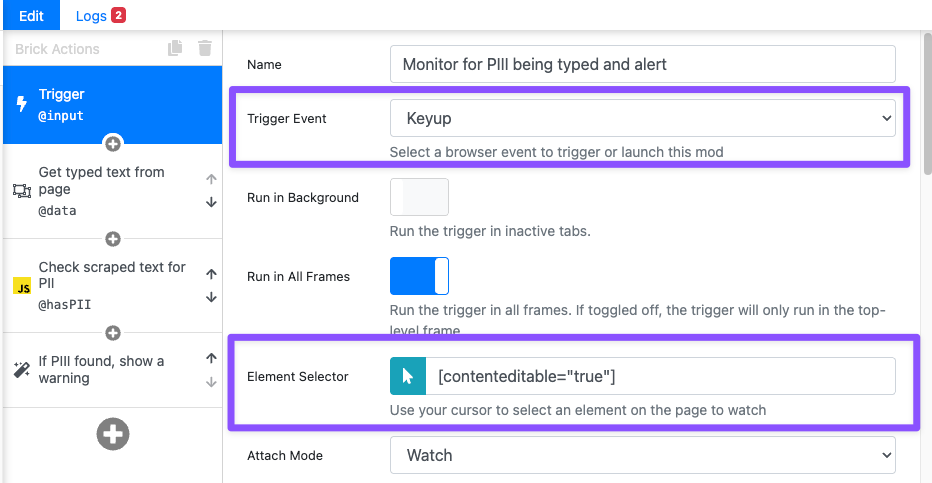
Click on the first brick in the Brick Actions Panel to see the configuration options for the Trigger appear.
You'll see options to specify the specify triggering event (keyup in this case), and which element to watch for typing in.

For instance, let's say you want to customize this mod so that PixieBrix monitors if there is PII being typed in an email in Gmail.
✅ In the browser URL bar, navigate to the page you want to interact with, like gmail.com .
✅ Inside the Trigger brick, you'll need to set the Element Selector field to be the specific element in Gmail that you type your message. In this case, it's [contenteditable="true"] .
You can also go to the Elements tab and explore the HTML on the page to define the element. (Learn more about how to do this by watching this video.)
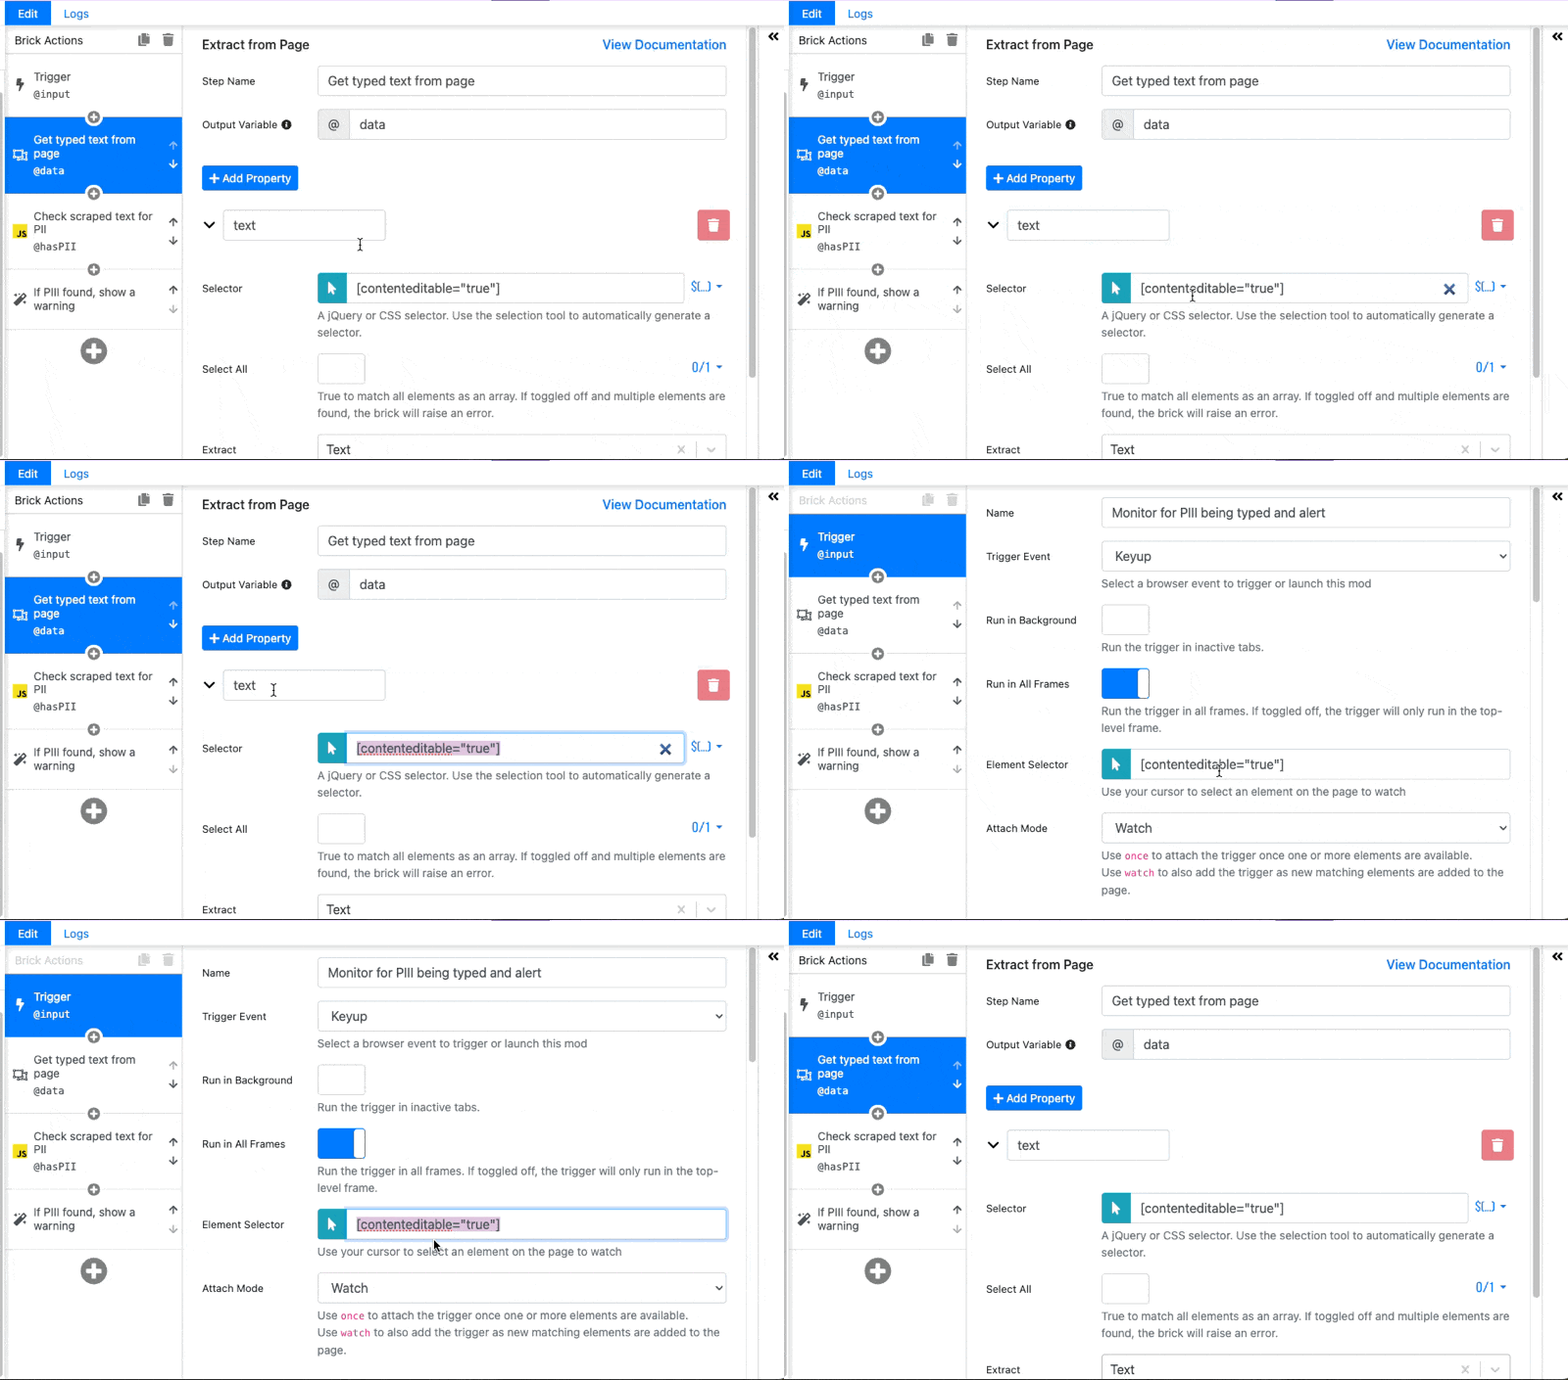
✅ Once you've identified that selector, go to the Get typed text from page brick (also known as Extract from Page), and change the selector to the new selector.
These two bricks should have the same selector, referencing the text input field you want to monitor:

Now you're ready to try it out.
Take it for a spin
If you're already on the page you want to test, such as gmail, just start typing in the field you specified. If you type a phone number, you'll see a warning that you've typed PII.
If you're editing on this page and want to try it on another tool, you'll need to save the changes you made in the Page Editor. Click the save icon on the first panel in the Page Editor and you'll be prompted to save a copy of the mod. Do that, and you can now open a new tab to go to the site you want to test, such as gmail.

